The photograph supplies the vehicle appearance for the Ramp Stunt template. The fixed motion reference supplies the ramp, camera movement and action. Your most useful preparation is to give the model one clear, complete subject. This guide focuses on that choice; the full creation tutorial covers quality, credits and task status.
Start with one complete car
Choose a photograph in which you can distinguish the roof, front and rear bodywork, and visible wheels without guessing. Leave a margin around the vehicle. A bumper touching the edge or a wheel cropped halfway out removes information that the moving version will need. A wider composition is useful when it preserves those details, rather than making the car a tiny part of the image.
Use one obvious main vehicle. If several cars fill the frame, select another photo where your intended subject stands apart. Do not depend on a caption or a registration number to tell the generator which one to animate. The upload workflow accepts one image, and this template does not provide a tool for marking a subject inside a group.
Compare the photo before you continue
- Whole vehicle versus a close crop
- Prefer a frame containing the complete body and visible tires. Retake a tight detail shot that shows only the grille, cabin or front wheel.
- Clear outline versus overlapping objects
- Look for clean separation between the car and its surroundings. Choose another angle if a fence, another vehicle or a person covers a wheel or a large body panel.
- Even light versus deep shadow
- Choose an exposure that shows paint, window boundaries and wheel shapes. If one side disappears into darkness or glare, move to softer light and check the resulting image.
- Visible structure versus an aggressive filter
- Prefer the ordinary sharp photograph over a heavily blurred, stylized or compressed copy. Zoom in before uploading and check that edges remain readable.
Side view or three-quarter view?
A side view makes the roofline, body length and wheel positions easy to inspect. A three-quarter view can show both the front and side. Choose the angle that presents your car most clearly, with the main panels in view. The model must interpret views absent from a single image during the stunt, so a clear angle provides a useful reference rather than a guarantee of identical reconstruction.
For a new photo, stand far enough back to fit the whole car, keep the camera steady, and avoid a dramatic tilt that hides its shape. Check the picture at normal size and zoomed in. If you are photographing a model car or another unusual vehicle, do not treat the displayed case as proof that the same level of detail has been tested for that subject.
Inspect the input from the real case
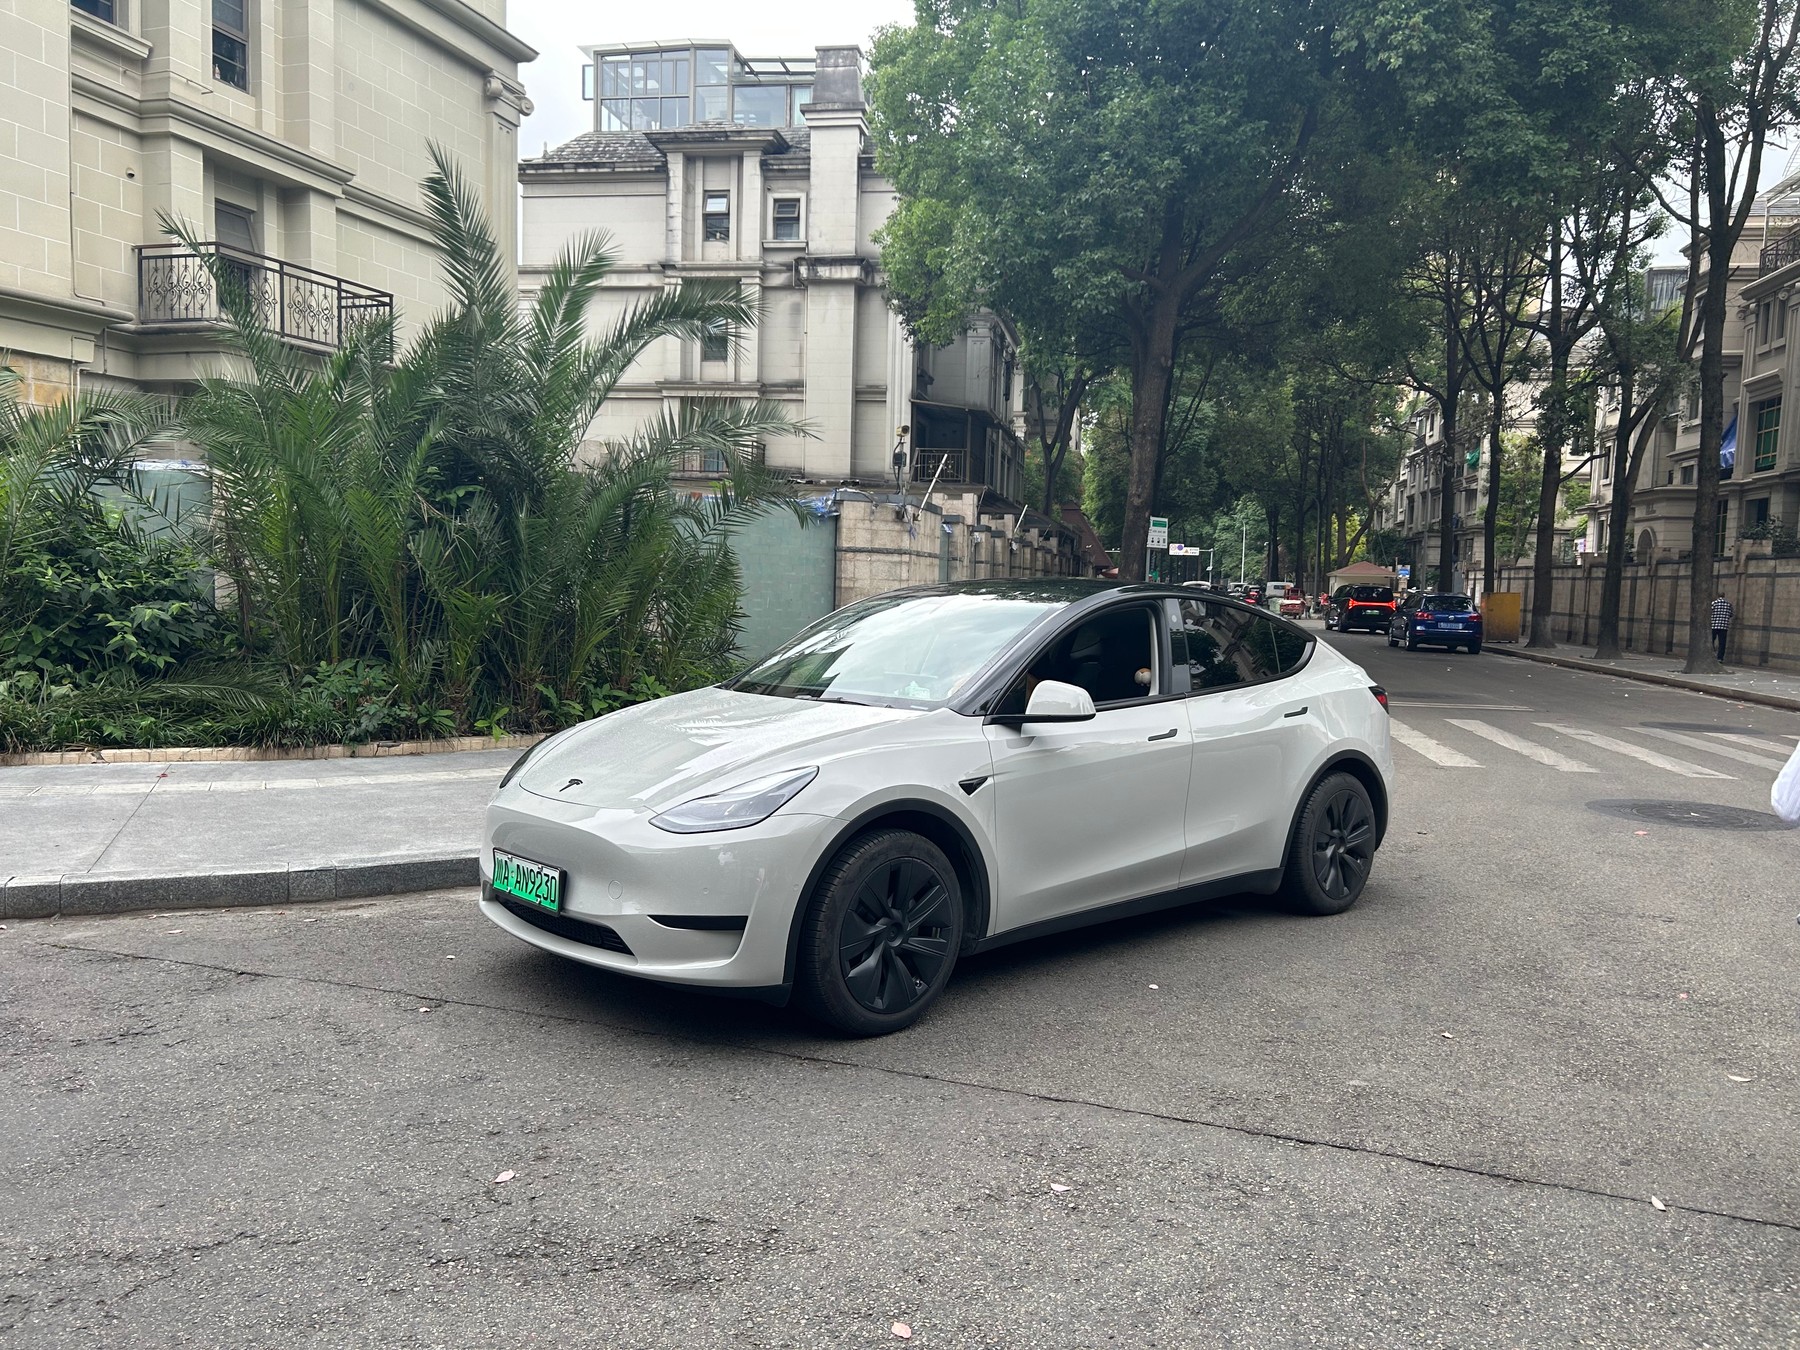
Use the photo as a concrete comparison for subject visibility, rather than as an instruction to copy its car or background. Compare its outline with the finished clip: the input guides appearance, while the output places that interpretation into the fixed Ramp Stunt action.
Check the file requirements
- Upload one JPG, PNG or WebP file, no larger than 10 MB.
- Both width and height must be between 301 and 5,999 pixels.
- Width divided by height must be greater than 0.4 and less than 2.5. An extremely narrow or wide image needs a different composition.
- Use a readable image file, rather than a renamed document or an animated clip.
Image dimensions and the requested video format are separate choices. A portrait photograph does not select a vertical video. The current output target remains 14 seconds in 4:3; quality is chosen as 480p or 720p.
Permission, privacy and your next step
Upload a photo you own or have permission to use. Obtain permission from people who appear in it. If a number plate, location or reflection reveals information you do not want to share, prepare a different photo before uploading. The service does not automatically obscure those details.
Ordinary private uploads are deleted 24 hours after upload; completed private videos are kept for 14 days after completion. The publicly authorized demonstration copy shown here is separate from that private retention cycle, as explained in the Privacy Policy.
Once your image passes these checks, open the Flying Car AI generator. Choose quality and review the applicable credit charge before continuing. The pricing page explains the current packs; selecting a clearer image does not create a free video or change a generation's credit cost.